ASPARAGUS
The Green Spear That Packs a Health Punch By Christine

The Green Spear That Packs a Health Punch By Christine

Carpal Tunnel Exercise and Taping Technique from Dr. John Bergman
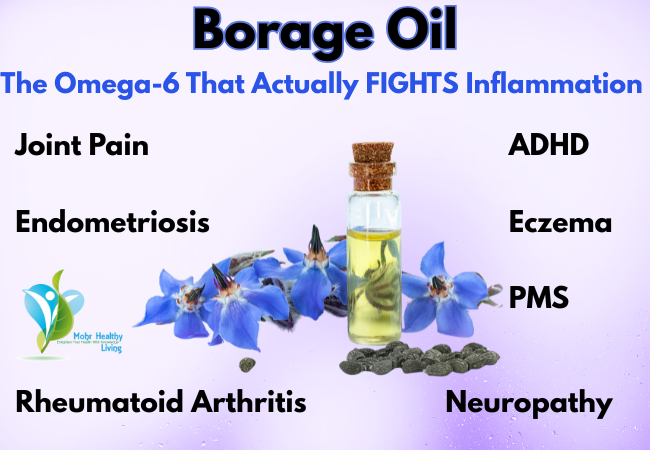
The Omega-6 That Actually FIGHTS Inflammation (and why I pair
5 Responses
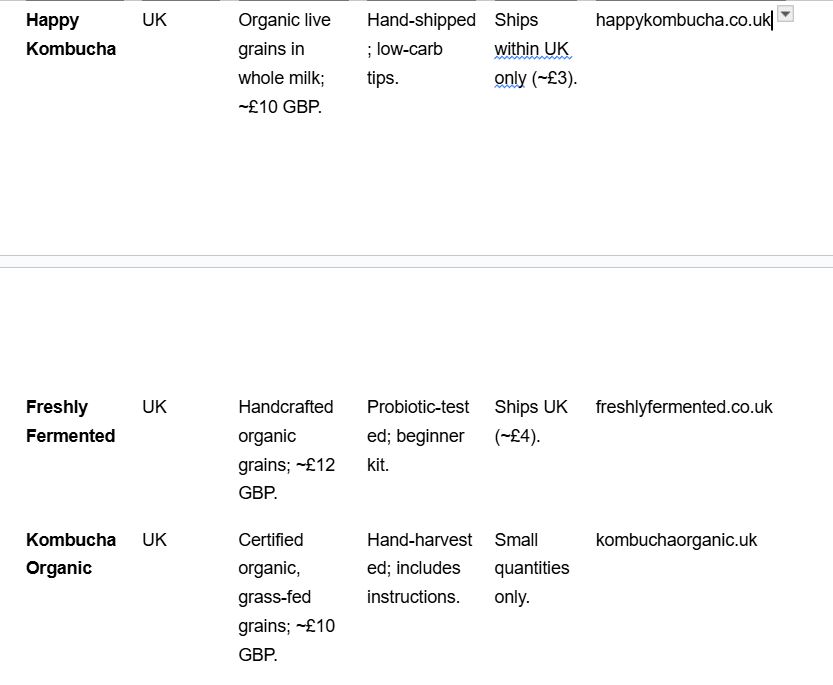
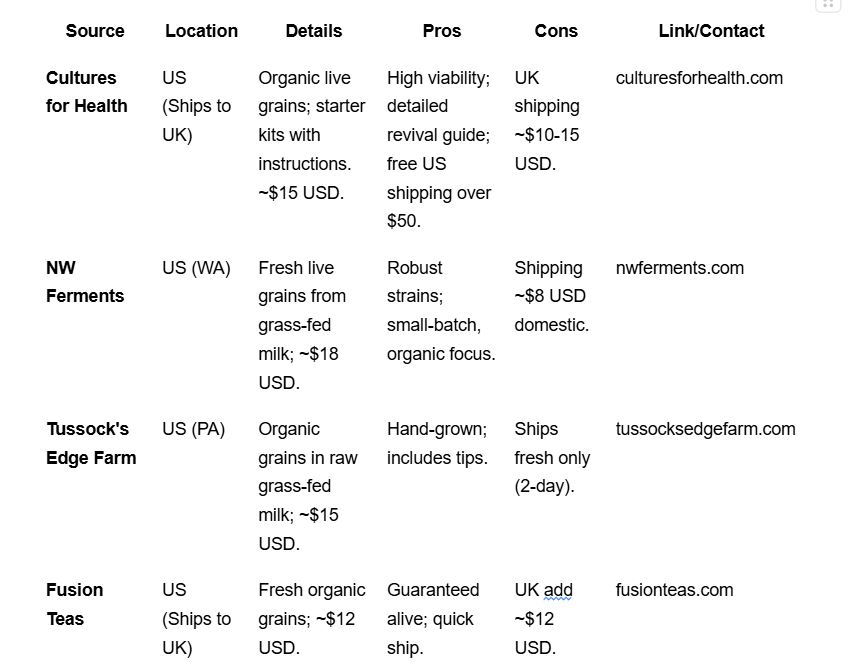
What grains do you like best?
I don’t understand. Kefir grains are kefir grains. I left info on where you can get them or see if anyone near you has some to share. Check Marketplace etc.Get fresh, not dehydrated
Thanks
If I’m not able to make my own what brands do you recommend?
I don’t know all the brands of kefir. I’d read the label for added ingredients, the less ingredients the better and of course organic would be best. It is easy to make though. If you have a health food store near you they may carry the better brands.